Difference between revisions of "Importing Textures with OpenIV"
(New page: '''Importing Textures with OpenIV''' tutorial by Fabio206. == Software & Downloads == * OpenIV latest Version, viewer/editor for GTA IV Files. * Photoshop or another...) |
|||
| Line 1: | Line 1: | ||
| − | '''Importing Textures with OpenIV''' tutorial by [[User:Fabio206|Fabio206]]. | + | '''Importing Textures with OpenIV''' tutorial by [[User:Fabio206|Fabio206]]. This tutorial explains how to change textures in [[GTA 4]] using [[OpenIV]] tool. |
== Software & Downloads == | == Software & Downloads == | ||
| − | * [[OpenIV]] latest | + | * [[OpenIV]] latest version, viewer/editor for the GTA IV files. |
* Photoshop or another graphics software. | * Photoshop or another graphics software. | ||
Revision as of 14:01, 29 January 2009
Importing Textures with OpenIV tutorial by Fabio206. This tutorial explains how to change textures in GTA 4 using OpenIV tool.
Contents
Software & Downloads
- OpenIV latest version, viewer/editor for the GTA IV files.
- Photoshop or another graphics software.
Step 1: Open .wtd files with OpenIV
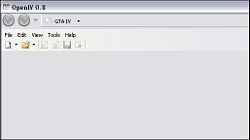
First of all, extract OpenIV archive files and open "OpenIV.exe"
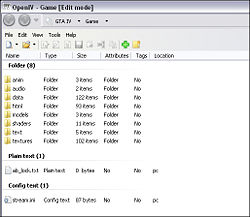
Clicking on "File" > "Open Content", OpenIV will automatic load GTA IV Main Folder, loading all relative files. You could view a folder tree and some previews.
In this tutorial I'll modify Niko shoes with my Nike Air Max Plus.
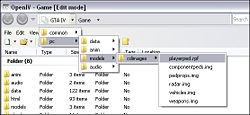
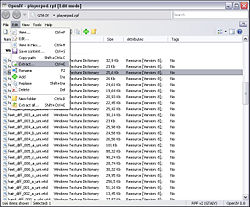
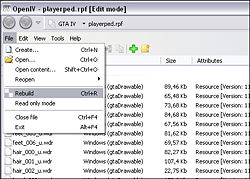
We'll modify "feet_diff_001_a_uni.wtd" located in playerped.rpf (\Grand Theft Auto IV\pc\models\cdimages).
Find it like in the image:
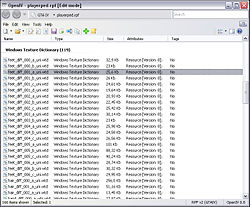
Click on playerped.rpf to open the archive and show files. There is a list of .wtd files. We know that in our tutorials we'll edit "feet_diff_001_a_uni.wtd".
BE SURE TO BACKUP YOUR FILES BEFORE EDITING ANY FILES!
You could backup "feet_diff_001_a_uni.wtd" clicking on "Edit" > "Extract".
Step 2: Edit a textures
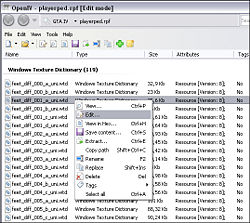
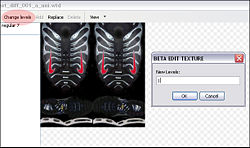
Select "feet_diff_001_a_uni.wtd" and right click on "Edit".
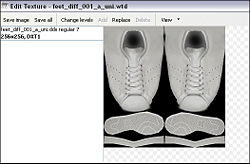
You'll have the textures files list on the left, in this case only feet_diff_001_a_uni.dss regular 7.
So, now you shoud have a .png file with your new texture. Be sure that .png new file has same resolution (in our case: 256x256).
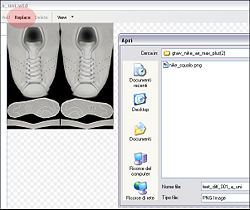
Click on "Replace" and load nike_squalo.png file.
IMPORTANT: Click on Change Levels and edit value to 1.
Step 3: Applying changes
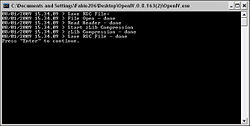
Now click on "Save" and press enter when DOS Window will open.
IMPORTANT: To apply modifies, click on "File" > "Rebuild".
Close the program and launch GTA IV.
External Link
| File Formats | .dat • .gxt • .ide • .img • .ipl • .nod • .sco • .rpf • .rrr • .wad • .wbd/.wbn • .wdd • .wdr • .wft • .whm • .wpl • .wtd |
| Documentation | Audio • Bink Video • Cryptography • Cutscenes • GXT Text • Image listing • Keycodes • Map Listing • Native functions • Paths • Radar Blips • Radio Stations • Saves • Scenarios • VTable • Weapons |
| Tools | ASI Loader • ENBSeries • SCO Toolbox • G-Texture • GIMS IV • Ingame WPL Editor • IV Needle • OpenIV • SparkIV • XLiveLess • WPL Manager • X Mod Installer Alice • C++ Script Hook • .NET Script Hook • SC-CL • Scocl |
| Tutorials | Importing Textures with OpenIV • Importing Textures with SparkIV |
| Multiplayer | GTA Connected • CitizenMP:IV Reloaded • IV Multiplayer • Four Multiplayer • Gostown IV |
| Useful links | Community portal • Discussion forums • Modding forums • Mods on GTAGarage.com |
