Difference between revisions of "Carcols.ymt"
(→zRotation) |
(→zBias) |
||
| Line 227: | Line 227: | ||
====zBias==== | ====zBias==== | ||
| − | < | + | ''<'''z'''Bias value="'''0.25000000'''"/>'' |
This set the bias of the distBetweenCoronas positioning. Changing this, is good for fine tuning. | This set the bias of the distBetweenCoronas positioning. Changing this, is good for fine tuning. | ||
Revision as of 01:56, 28 December 2017
Carcols controls vehicle colors(?), mod kits, and lights. This file isn't for assigning these things to particular vehicles, for that see carvariations.ymt.
Contents
|
Colors(?)
Kits
kitName
The mod kits name. Used for carvariations.ymt
id
Number value the kit will be assigned to.
kitType
visibleMods
Vehicle mods that change or add a model/texture.
modelName
Model name from the vehiclemods .rpfs.
modShopLabel
linkedModels
turnOffBones
type
- VMT_BONNET
- VMT_GRILL
- VMT_ROOF
- VMT_BUMPER_F
- VMT_BUMPER_R
- VMT_SPOILER
- VMT_EXHAUST
bone
- chassis
- bumper_f
- bumper_r
collisionBone
- chassis
- mod_col_1
- mod_col_2
cameraPos
- VMCP_DEFAULT
audioApply
weight
Amount of weight, in kilograms, that the mod adds.
turnOffExtra
- Value: true or false.
disableBonnetCamera
- Value: true or false.
allowBonnetSlide
- Value: true or false.
linkMods
statMods
Mods that change stats.
identifier
modifier
audioApply
weight
Amount of weight, in kilograms, that the mod adds.
type
- VMT_ENGINE
- VMT_BRAKES
- VMT_GEARBOX
- VMT_ARMOUR
- VMT_HORN
- VMT_SUSPENSION
slotNames
liveryNames
Lights
Here begins the optional section for a custom light settings ID Why optional? Because we can keep this section closed. We can apply light settings IDs to our vehicles that was already made. We set the existing setting on our carvariations.meta or carvariations.ymt
id
Like on modkit IDs, we got an new ID we need to set for our light setting. This ID can be used later on other vehicles without needing to create a new light settings ID For ex. <id value="YouLightSettingIDNumber"/>
indicator
Here start the main settings for your indicators. Its basicly the type of light cones and textures that get drawn on the ground. The section continues with the following settings:
intensity
<intensity value="0.37500000"/> Itensity change, how bright, and strong the light will be.
falloffMax
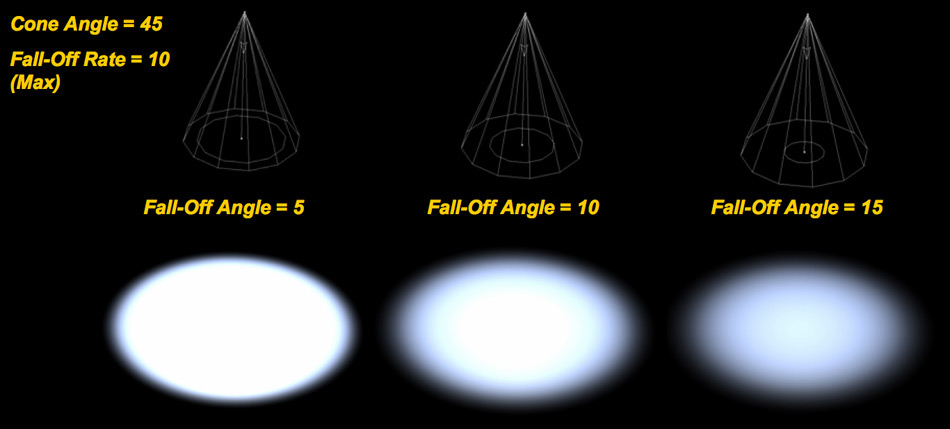
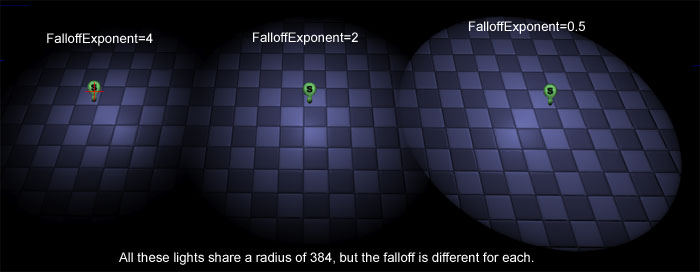
<falloffMax value="2.50000000"/> Test it yourself, its hard to explain. It will change smooth the lights goes in each directions. The following picture can help you to understand the whole section more.
falloffExponent
<falloffExponent value="8.00000000"/> Simular setting. Take a look
innerConeAngle
<innerConeAngle value="45.00000000"/> The light thats going to be drawn on the ground, got a inner cone and a outer cone
outerConeAngle
<outerConeAngle value="90.00000000"/> The outher cone will change how far the light will fall from the light pivot position to all sides. Lowering will make it more like a laser light. Its useful to increase when you want to light up a small room with one single light. It goes more to all side then pointing like a spot light.
emissiveBoost
<emmissiveBoost value="false"/> It will affect the brightness multiplier, color and intensity of the light cones and coronas. Its like EmissiveMultiplier. Set it to true if you want it.
color
<color value="0xFFFF8000"/> It changes the light color of your indicators cones (NOT CORONAS) Some light textures just block the change of that color. You need to set the right light texture first. The color is written in HEX, just use https://www.webpagefx.com/web-design/color-picker to get the HEX color. Make sure to paste it after 0xFF...
Simple example: I just want to have a green light cones and coronas on my vehicle. I use the side and pick a green color. The site show only #1EFF00 as color. In the carcols file it will be formated as: 0xFF1EFF00
textureName
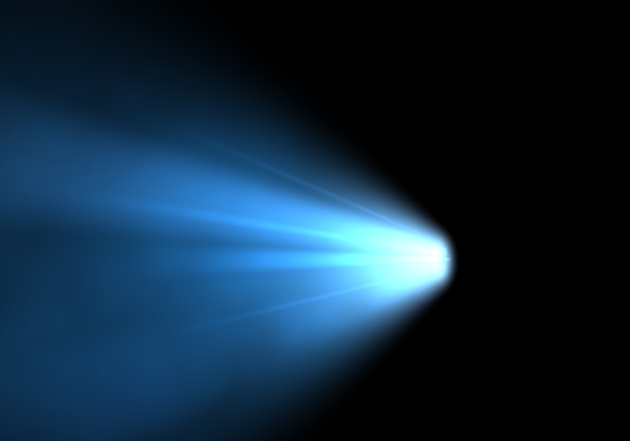
<textureName/> Texture names are important for color changing. It also set the outfit of our light cones. It can look very different. You can keep it closed if you want.
To understand what that is, look at the following picture:
GTA V uses a bunch of different light textures they all act different.
Here are some texture names:
<textureName>VehicleLight_car_LED1</textureName>
<textureName>VehicleLight_car_LED2</textureName>
<textureName>VehicleLight_car_standardmodern</textureName> <textureName>VehicleLight_car_oldsquare</textureName>
<textureName>VehicleLight_car_antique</textureName> <textureName>VehicleLight_car_standard70s</textureName>
<textureName>VehicleLight_car_utility</textureName> <textureName>VehicleLight_bike_sport</textureName> <textureName>VehicleLight_bike_sport</textureName> <textureName>VehicleLight_bike_round</textureName>
<textureName>VehicleLight_bicycle</textureName>
<textureName>VehicleLight_misc_squarelight</textureName>
<textureName>VehicleLight_misc_searchlight</textureName>
Thats all i found so far.
mirrorTexture
<mirrorTexture value="true"/> This mirror the texture we set on the light. For example, you want to have the light cone of your headlights pointing to the other direction. Set it to false if you don't want that.
The whole section end with:
</indicator>
rearIndicatorCorona
Now we have the main indicator setting. But we need our single corona settings. It starts with this:
size
<size value="0.70000000"/> This will set the size of your corona when you are near the vehicle
size_far
<size_far value="7.00000000"/> This will set the size of your corona when you look far away to the vehicle. It makes sense to always choose an higher value then the simple size value.
intensity
<intensity value="2.00000000"/>
This will change the corona itensity. Self explanatory, isn't it?
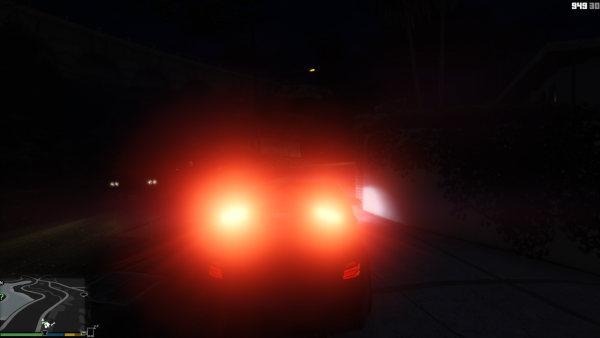
I made an example how the light can look when i increase the intensity of the corona of my taillights very high:
intensity_far
<intensity_far value="9.00000000"/> This will change the corona intensity when you are far away from the vehicle. Its like a LOD version for coronas.
color
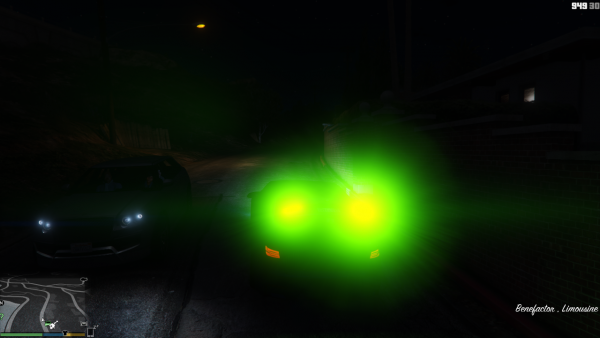
<color value="0x00000000"/> This set the color of the coronas like on light cones. If you are was reading the cone color section, then you would know about my green color example. The same color goes here then.
Here is a pic of my green color setting:
numCoronas
<numCoronas value="1"/> = Number of coronas This will set how many coronas the rear indicators have. It will start multiplie them from the left and right side down from the pivot position of your vehicles light dummy.
Here is an example of a simple stripe using 20 single coronas and low distance between coronas + high intensity.
distBetweenCoronas
<distBetweenCoronas value="128"/> This will change the distance between all coronas of the rear indicatos.
distBetweenCoronas_Far
<distBetweenCoronas_far value="255"/> This will change the distance between all coronas of the rear indicatos when you see the vehicle far away from you. It makes sense to use always a 2x higher value of your main setting. For ex. 128 x 2 = 256. Just make a straight number out of it. So it is 255 instead of 256.
xRotation
<xRotation value="0.00000000"/> This set the rotation of the corona on the X axis. It will heavily affect if you have multi coronas. Its useful if you want to set coronas at diffent places.
yRotation
<yRotation value="0.00000000"/> This set the rotation of the corona on the Y axis. It will heavily affect if you have multi coronas
zRotation
<zRotation value="0.00000000"/> This set the rotation of the corona on the Z axis. It will heavily affect if you have multi coronas
zBias
<zBias value="0.25000000"/> This set the bias of the distBetweenCoronas positioning. Changing this, is good for fine tuning.
pullCoronaIn
<pullCoronaIn value="false"/> It pull the corona inside the vehicle light object. You don't want to see the coronas directly? Just use this.
frontIndicatorCorona
The same goes for this section.
tailLight
This section too
tailLightCorona
yep, its pretty the same
tailLightMiddleCorona
This section have the same values, but it basicly creates coronas at the position between the taillight coronas you already set up.
headLight
The same settings. Headlights always use a custom light texture.
headLightCorona
It makes it very cool to increase the intensity for headlight coronas.
reversingLight
Nothing more to explain.
reversingLightCorona
Reversing lights also use coronas.
name
Your setting already have a custom ID. But you also need a name for it. For ex. <name>ferrarienzo</name>
More questions? Ask here: http://gtaforums.com/topic/857958-vehicles-light-and-siren-setting-ids-explained/
Here is a simple carcols file without any tuning setting. You can test it on your Add-On vehicle. carcols.ymt example
| File Formats | .awc • .dat • .gfx • .gxt2 • .ide • .meta/.ymt/.xml • .mrf • .patch • .rpf • .ybn/.ybd • .ycd • .ydd • .ydr • .yed • .yfd • .yft • .yld • .ymap • .ymf • .ynd • .ynv • .ypdb • .ysc • .ytd • .ytyp • .yvr |
| Documentation | Bink Video • Native functions • Weather types |
| Tools | OpenIV • GIMS Evo • CodeWalker |
| Multiplayer | |
| Useful links | Community portal • Discussion forums • GTA V Modding Forum • GTA5-Mods • Native Functions Database (alloc8or) |
